
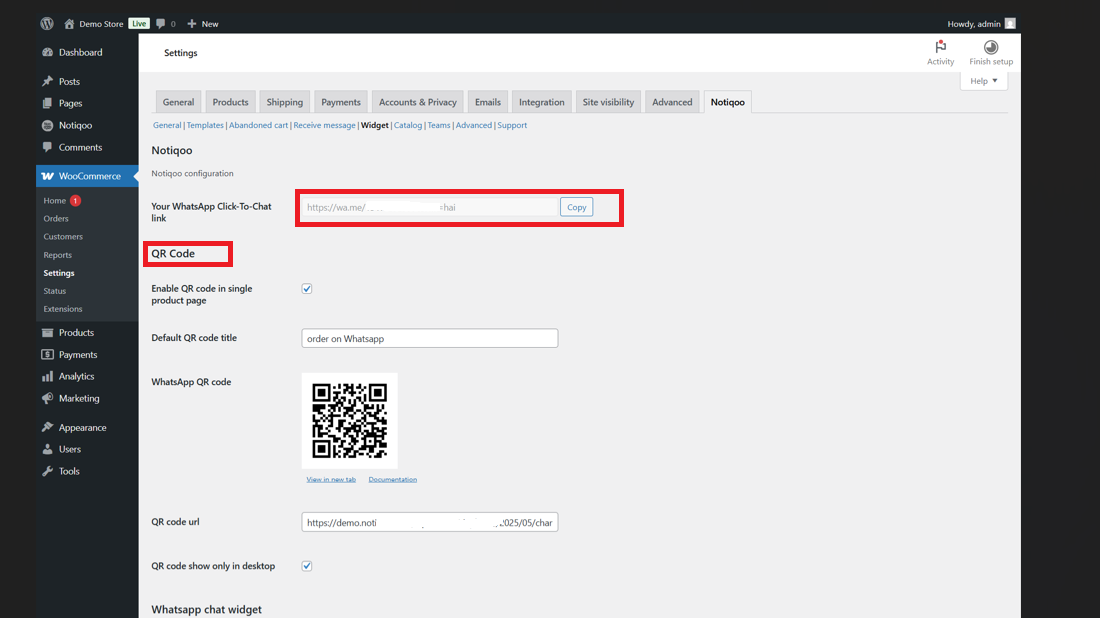
To configure custom widget options such as Click to Chat or WhatsApp QR Code, go to:
Notiqoo → Settings → Widgets
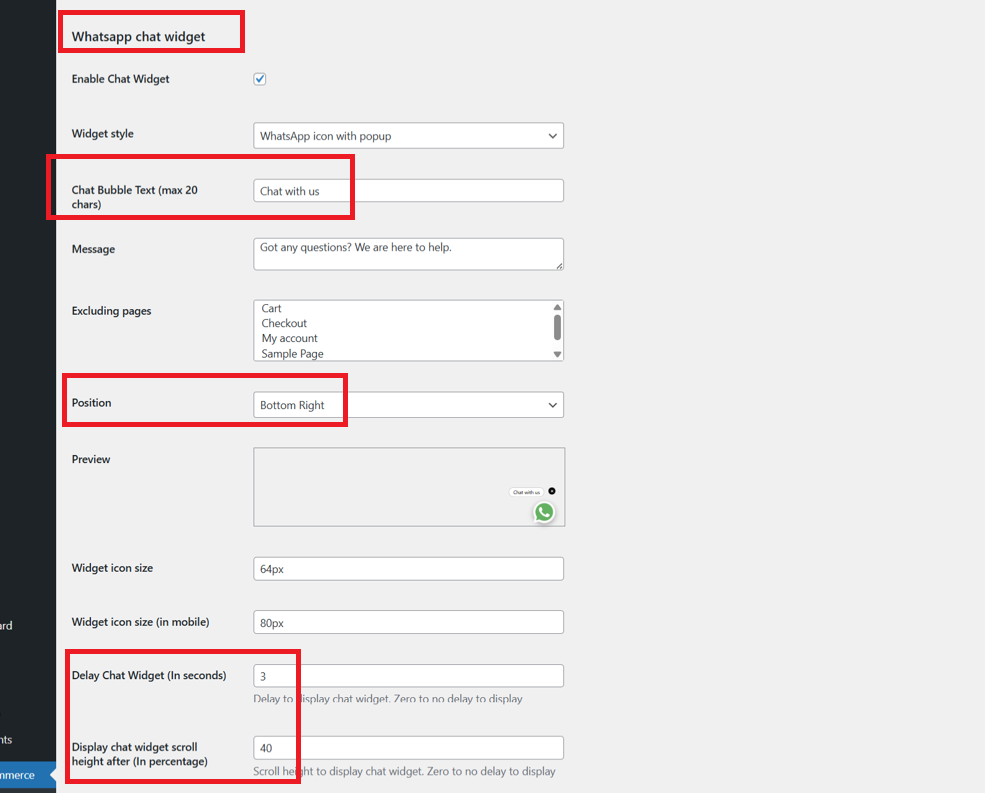
WhatsApp Chat Icon Widget
- Enable the chat icon option to display a WhatsApp chat bubble on your website.
- Customize its:
Label (e.g., “Chat with us”)
Predefined message
Position on the screen (left/right, top/bottom).- Use the shortcode [woom-chat-widget] to manually place the widget on any page or post.
- Be sure to save your changes to activate the widget.
Note: Ensure your WhatsApp number is provided under WC Messaging settings for the widget to function properly.
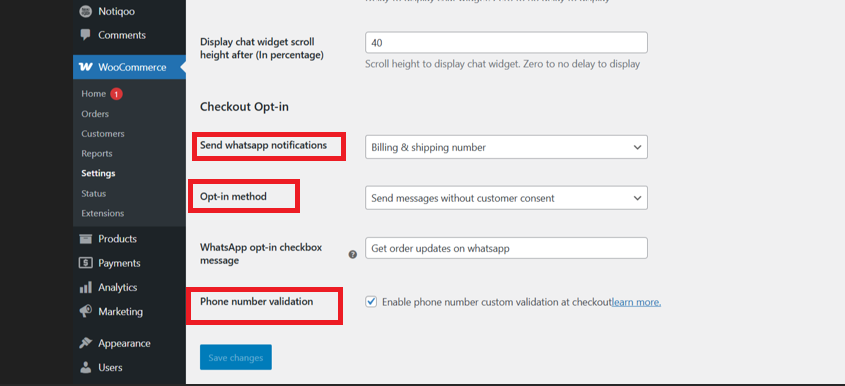
Phone Number Validation
If you already have a plugin that validates phone numbers, there’s no need to enable the custom validation feature.
However, if you notice a high volume of invalid phone numbers leading to WhatsApp message failures, enabling custom validation can help reduce spam and ensure message deliverability.
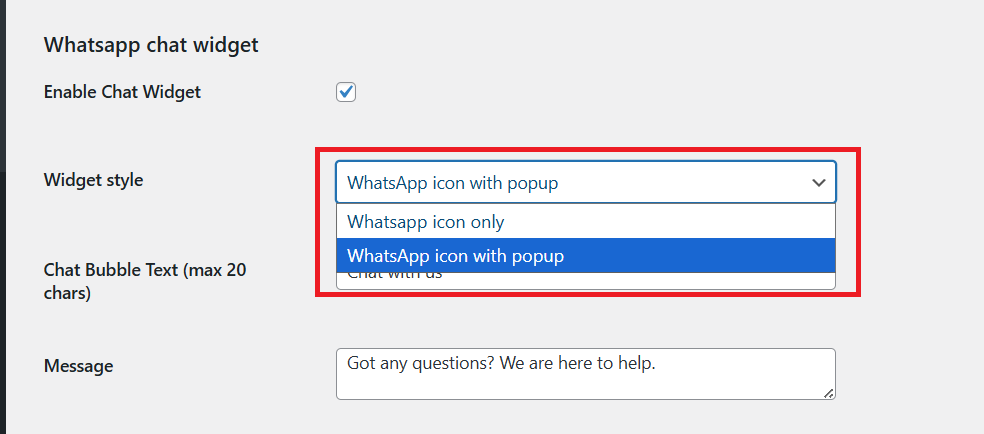
WhatsApp Chat Widget – Widget Style
You can choose how the WhatsApp icon appears on your site. There are two options:
1. WhatsApp Icon Only
This style shows just the WhatsApp icon on your website.
When a user clicks the icon, it directly opens the WhatsApp chat window.
It’s perfect if you prefer a clean and simple design.
2. WhatsApp Icon with Popup
This style shows the WhatsApp icon along with a popup message box.
It displays a short greeting or support message above the icon.
This helps to grab attention and increase chat conversions.
Customer Opt-In Options:
- Show Checkbox for Customer Consent
A checkbox is displayed on the checkout page.
If the customer consents by ticking the box, WhatsApp notifications will be sent. - Send Messages Without Customer Consent
Messages are sent automatically, without requiring explicit customer approval.
You can fully customize the opt-in checkbox message with your own text to align with your branding or legal requirements.
📺 Watch the video tutorial to learn how to set up
