
No products in the cart.
Facebook Whatsapp Configuration
Facebook WhatsApp Configuration Guide
To integrate WhatsApp with your WordPress plugin, you’ll first need to set up an app via Facebook for Developers and generate the required API credentials. This may sound complex, but we’ve broken it down into simple steps:
Step-by-Step Setup
1. Log in to Facebook for Developers
- Visit https://developers.facebook.com.
- Click My Apps in the top menu.
- Click the Create App button on the right.

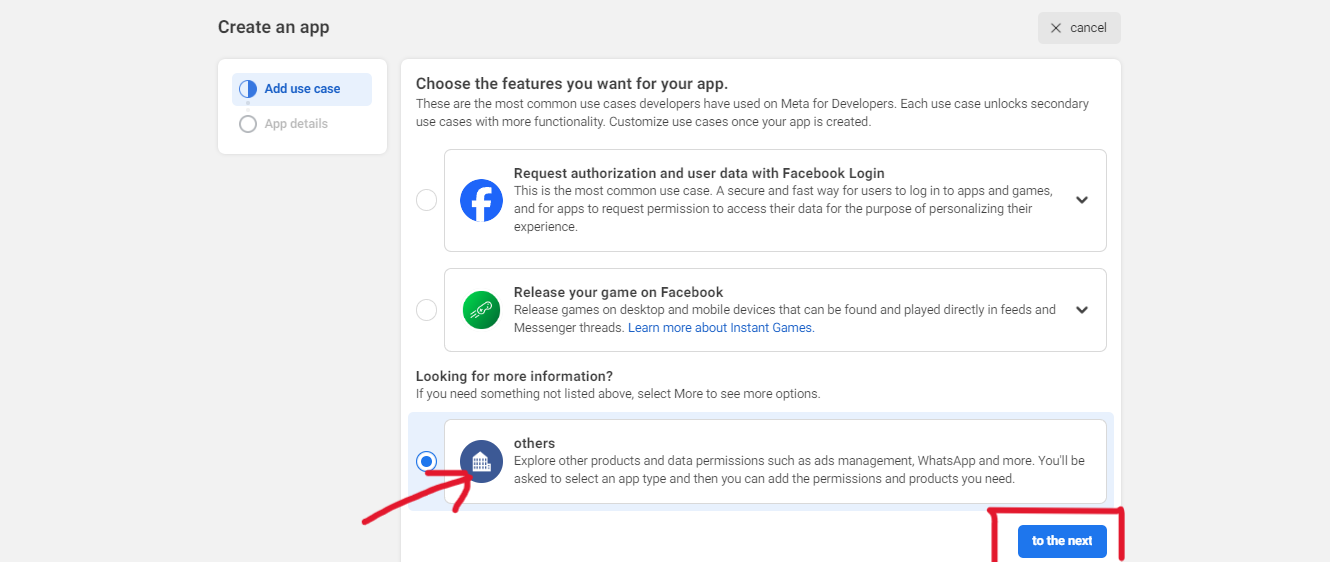
2. Choose App Type
- In the modal that appears, select Others and click Next.
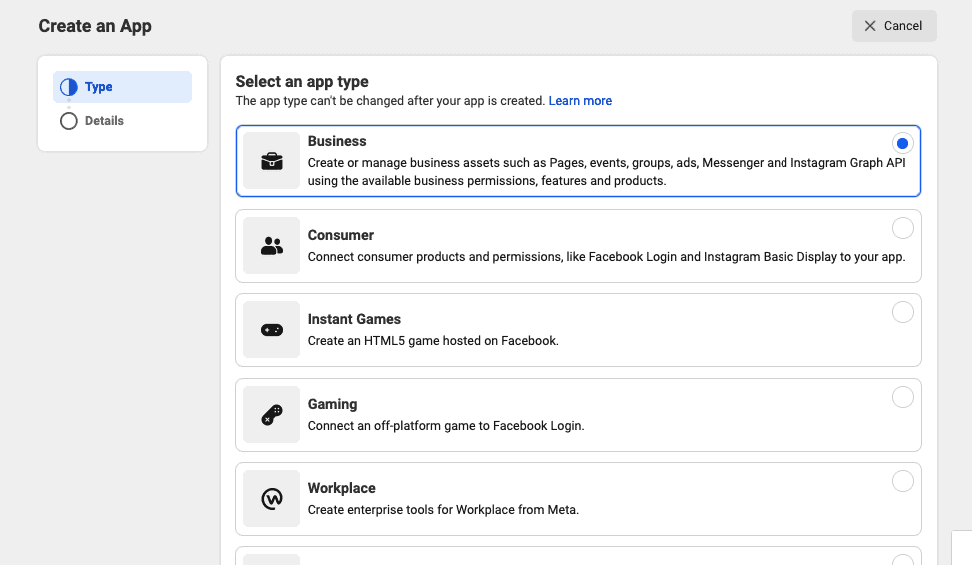
- Choose Business as the app type and click Next.
3. App Details
- Enter your App Name and Contact Email (for admin purposes).
- Select a Business Account if available.
- Click Create App.

- Enter your Facebook password when prompted to confirm.
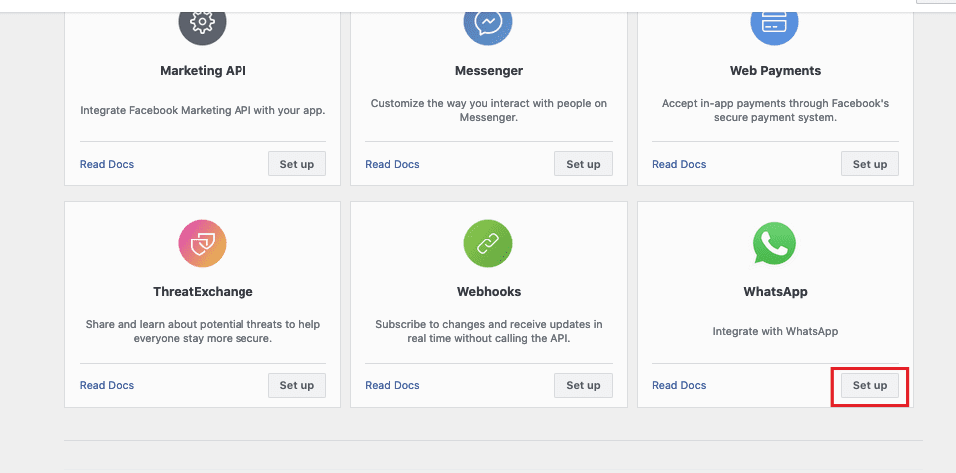
4. Add WhatsApp Product
- After your app is created, scroll down to the WhatsApp section.
- Click the Set Up button under WhatsApp.
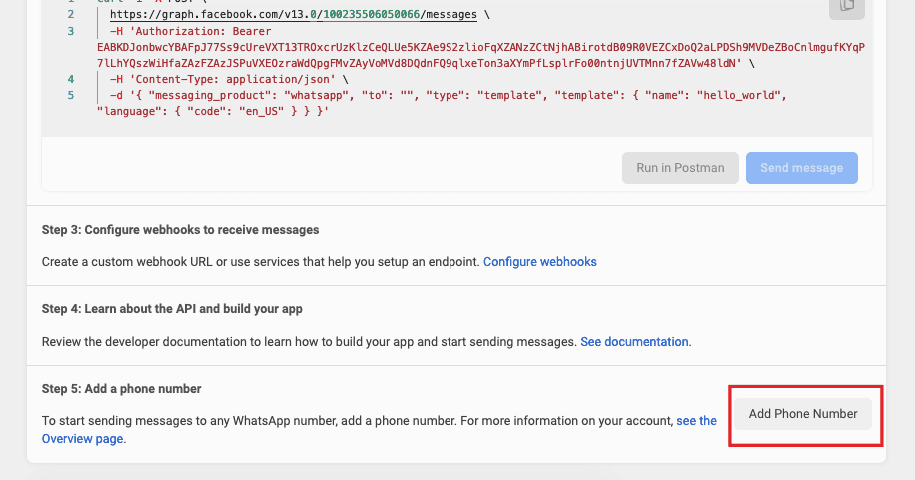
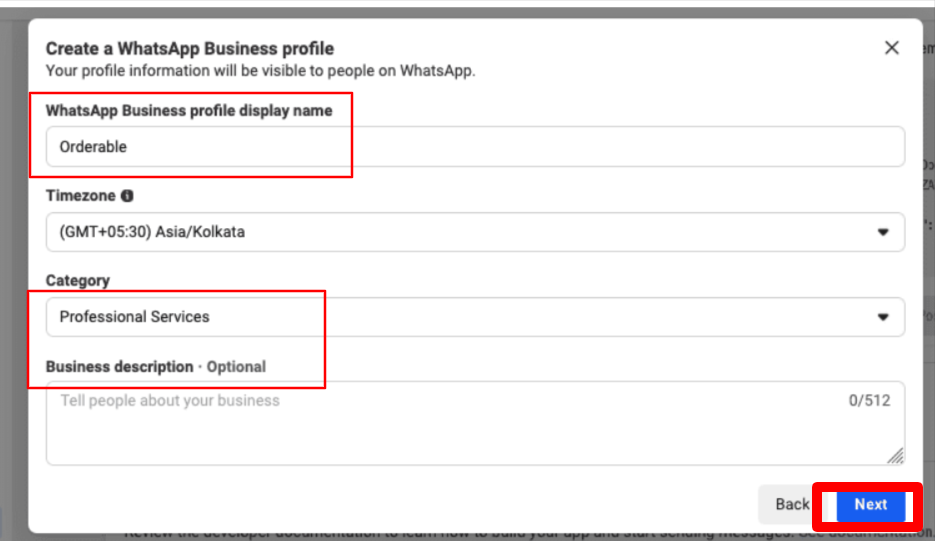
5. Set Up WhatsApp Sender
- You’ll be redirected to the Getting Started page.
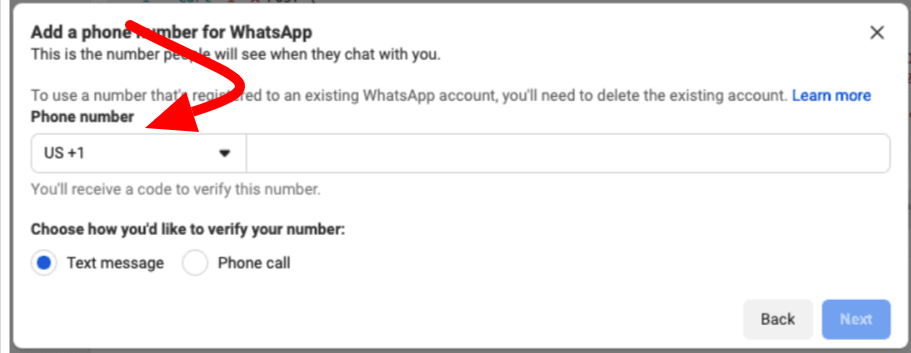
- Add the Phone Number you want to use for sending messages.
- Enter your WhatsApp Business Profile details.
6. Verify Your Phone Number
- Enter the number and verify it using the 6-digit code sent via SMS or WhatsApp.
Important Note:
A phone number registered to the WhatsApp Business Cloud API cannot be used in the regular WhatsApp or WhatsApp Business app. You must remove it from other apps before registering it here.
7. Retrieve Your API Credentials
After successful setup, copy the following credentials from the dashboard:
- Access Token
- Phone Number ID
- WhatsApp Business Account ID
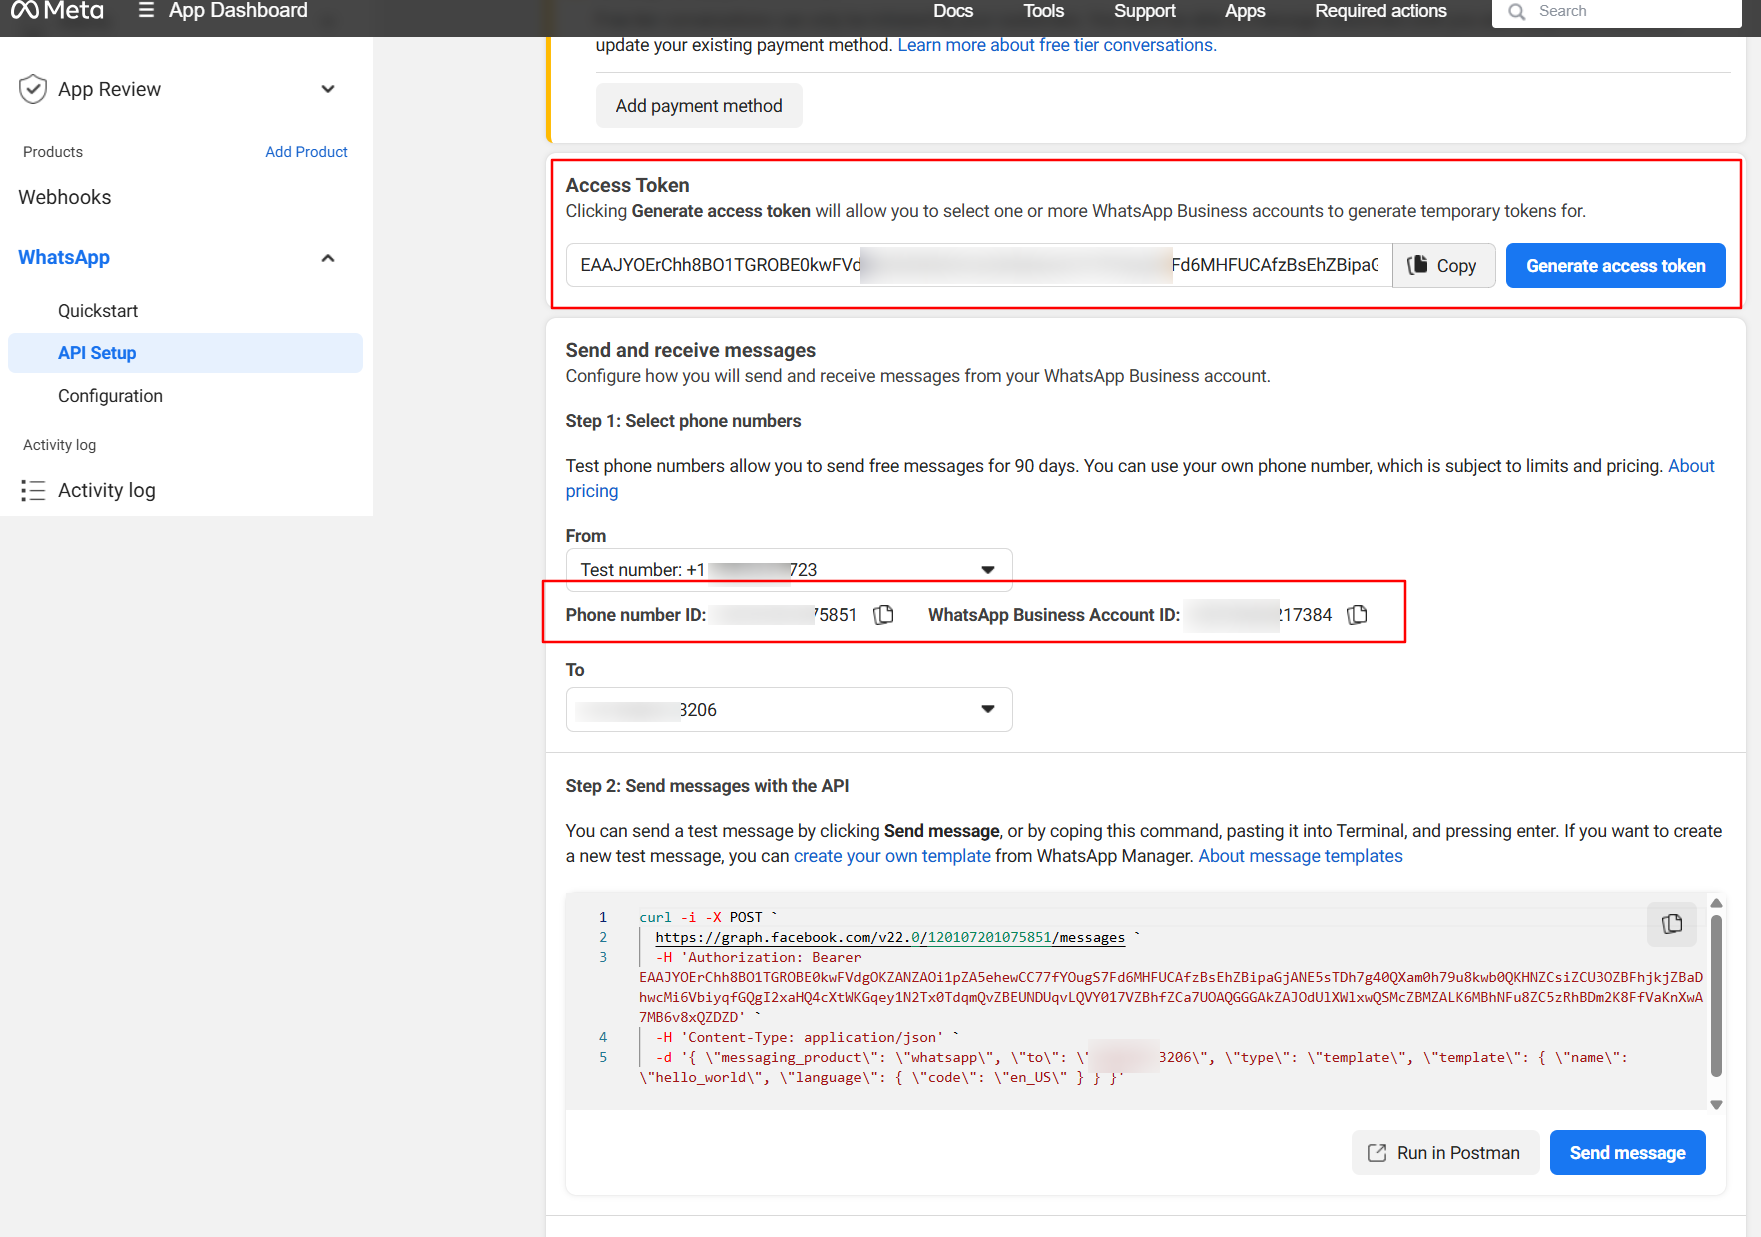
These credentials will be used to connect your WhatsApp Business account with your WordPress plugin.
📺 Watch the video tutorial to learn how to set up