
Settings
Once activated, navigate to Notiqoo -> Automator in the left sidebar to start configuring your workflows.
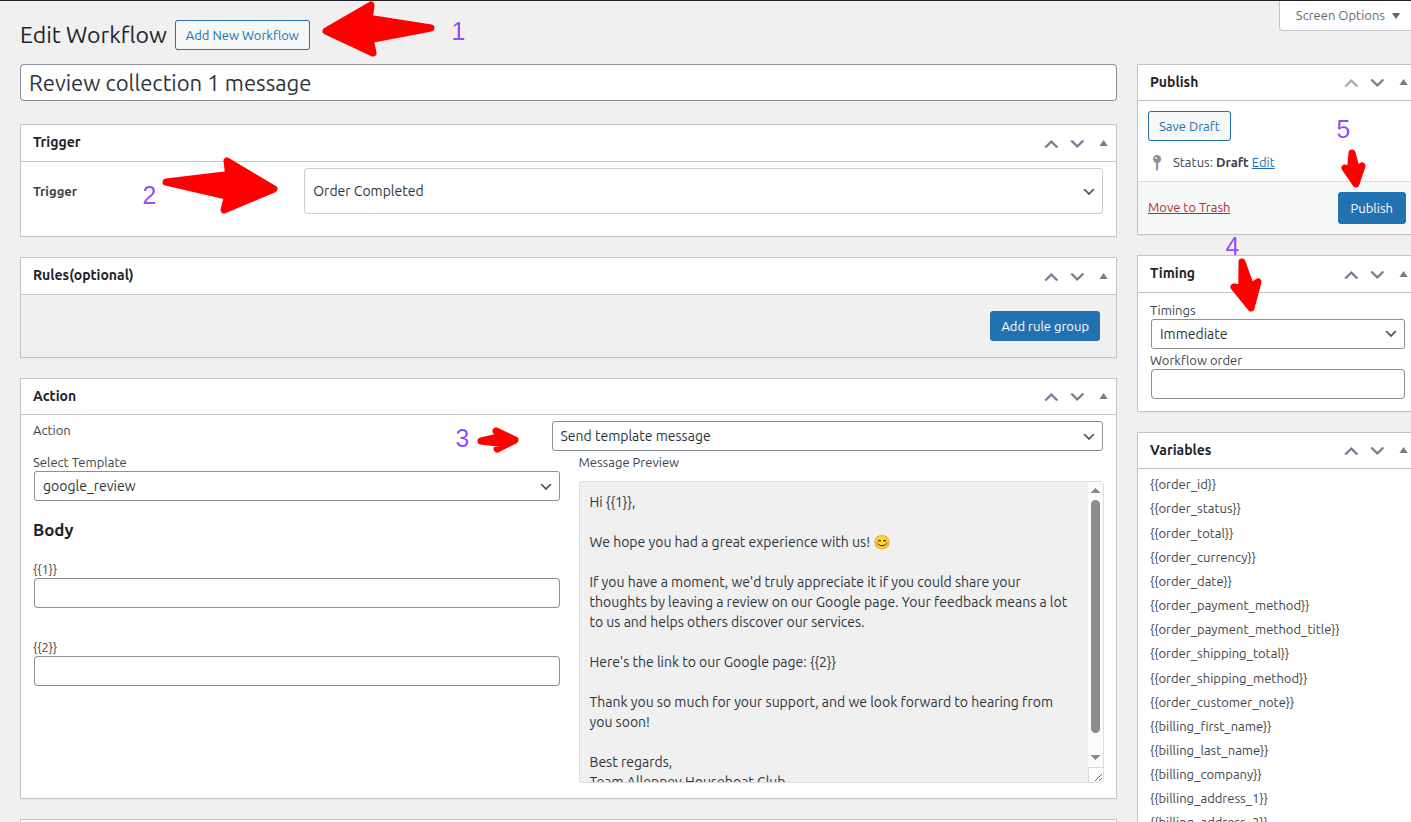
1. Add New Workflow
To create a new workflow, click Add New Workflow. You’ll be prompted to configure the following settings:
Workflow Name
Enter a descriptive name for your workflow. This name will help you easily identify and manage your workflows.

Trigger Selection
The Trigger is the event that starts the workflow. Common triggers include:
- Order Completed
Automatically trigger the workflow when a customer’s order is marked as “Completed” in WooCommerce. - First Chat Initiates
Start the workflow when a customer initiates a new chat, enabling automatic responses.

Example Use Case
If you choose Order Completed as the trigger, the workflow could send a Thank You message or a Review Request automatically once the order is completed.
2. Define Rules
Rules determine when a workflow should be triggered. By adding rules, you control the execution of the workflow.

Custom Rules and Operators
You can extend the flexibility of your workflows by adding custom rules. Use the following filters to create advanced conditions:
php
apply_filters(‘notiqoo_additional_rule_terms’, $terms);
apply_filters(‘notiqoo_additional_operators’, $operators);
This allows you to set highly specific conditions for your workflows.
Workflow Execution
Workflows will only run if all the conditions in the rules are met. If the rules are satisfied, the workflow will execute the designated actions.
3. Action Configuration
Send WhatsApp Message Template

After the workflow is triggered, select a message template to send via WhatsApp. Choose from a variety of pre-built templates or create a custom message tailored to your needs.
Example Use Case
If your trigger is Order Completed, you could select a “Review Request” template to automatically ask customers for feedback once their order is completed.
Send Messages to Webhook URL
You can now send messages to any webhook URL. Just paste the link, set up the workflow, and manage it easily.

4. Timings Configuration
Immediate Execution
Choose this option if you want the workflow to run immediately after the trigger event.

Delayed Execution
Select this to schedule the workflow to run after a specific delay (e.g., hours, days, or weeks). Perfect for reminders or follow-ups.

Workflow Order
If multiple workflows are triggered by the same event, you can set their execution order. This ensures that workflows are triggered in the desired sequence without any conflicts.
Example Use Case
If you set a 24-hour delay for the Order Completed trigger, the workflow will execute 24 hours after the order is completed.
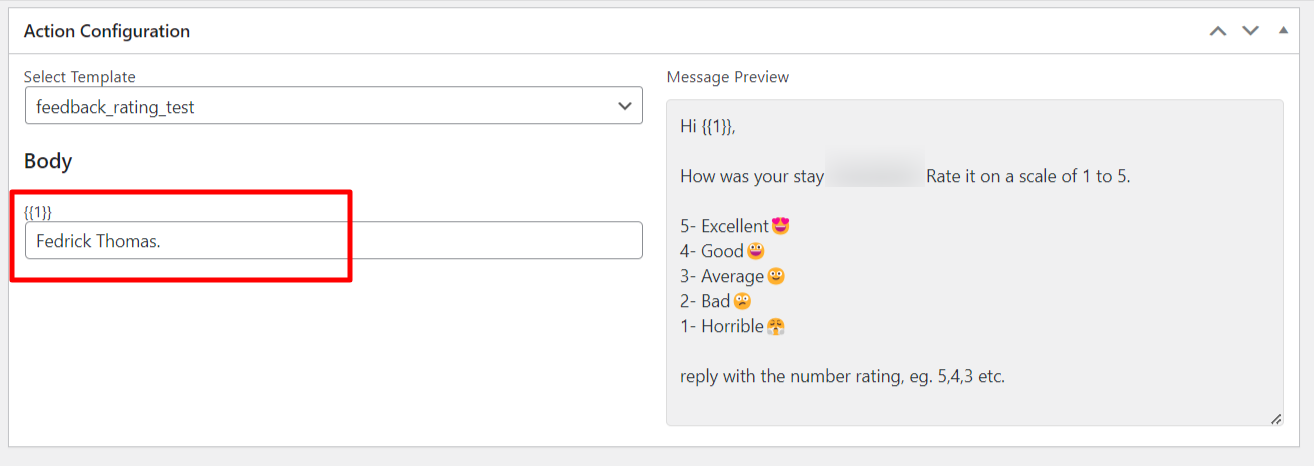
5. Using Variables
Variables allow you to dynamically insert customer-specific information into your message templates.
For example, {{customer_name}} will be replaced with the customer’s actual name when the message is sent.
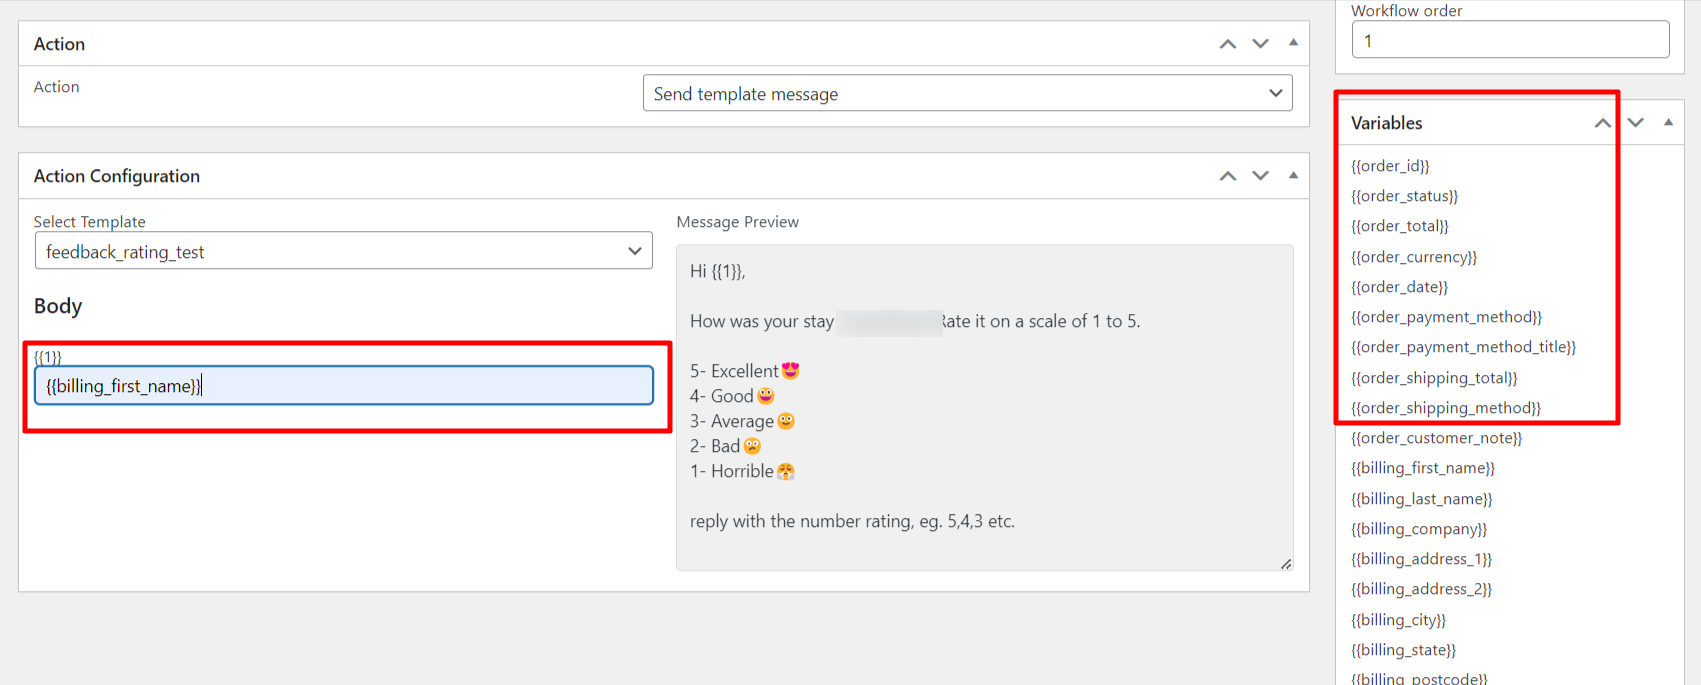
You can use variables to add personalized details such as the customer’s name, order number, or shipping details to your WhatsApp messages.
Static Text
For non-variable information, like your company name or a fixed message, just type it directly into the template.
If you want to add a direct name or place, you don’t need to use curly braces {{ }}.
For example, if you want to add your company name, you can simply write:
name_of_your_company or specific_name instead of using {{name_of_your_company}}.
Publish the Workflow
Once you’ve configured the workflow, including triggers, rules, and actions, click Publish to make the workflow live. It will now be activated and run automatically based on the conditions you’ve set.
