
Navigate to Notiqoo → Settings → Notifications→ Sync Now:

When you add new message templates in the Facebook WhatsApp message template section, they will not appear in the select box until you synchronize using Sync now button.
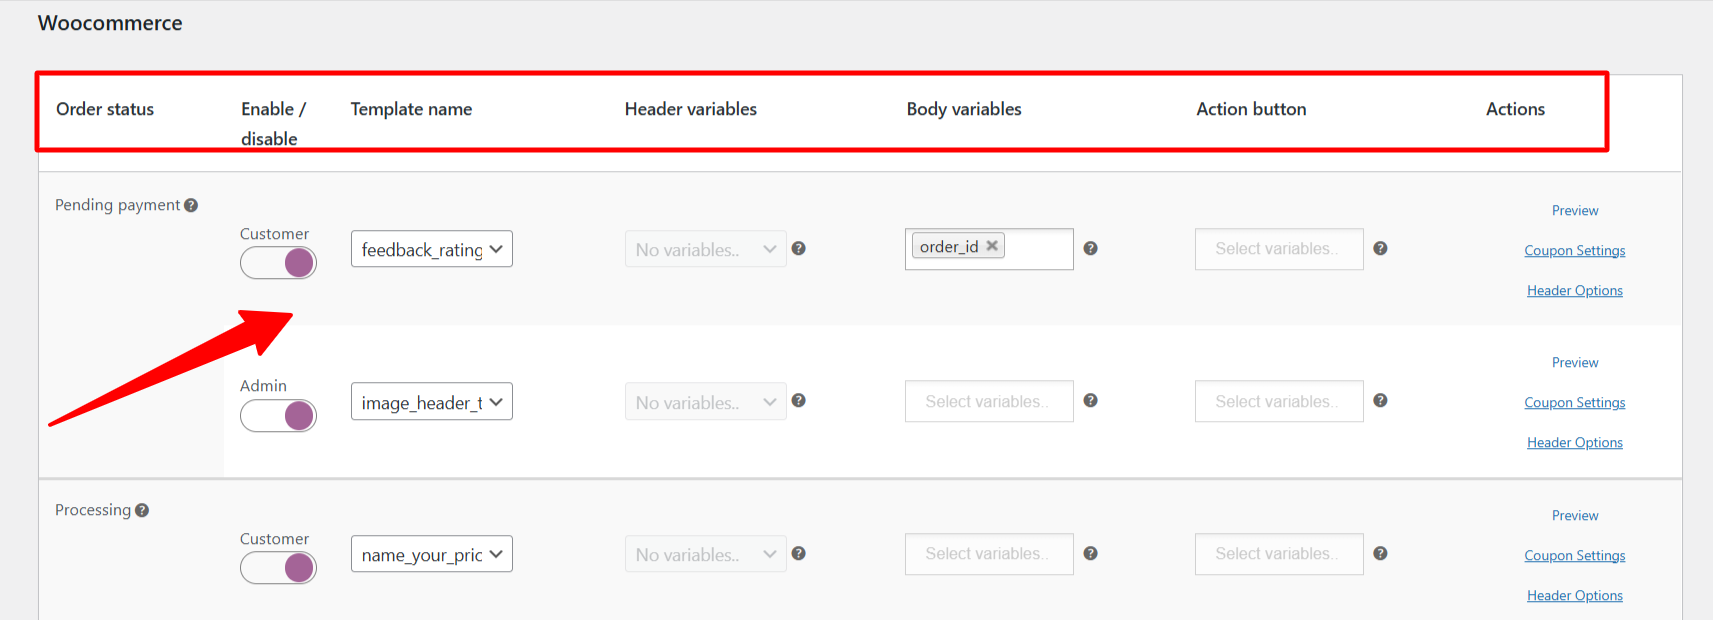
1. Enable WhatsApp Order Status Notifications
Activate order status messages by selecting a template from the dropdown. You can customize template parameters for the header and body individually. Different templates can be set for customers and admins, or the same one for both.
- Enable/disable notifications for each recipient type.
- To skip sending messages to admins, simply disable admin notifications.
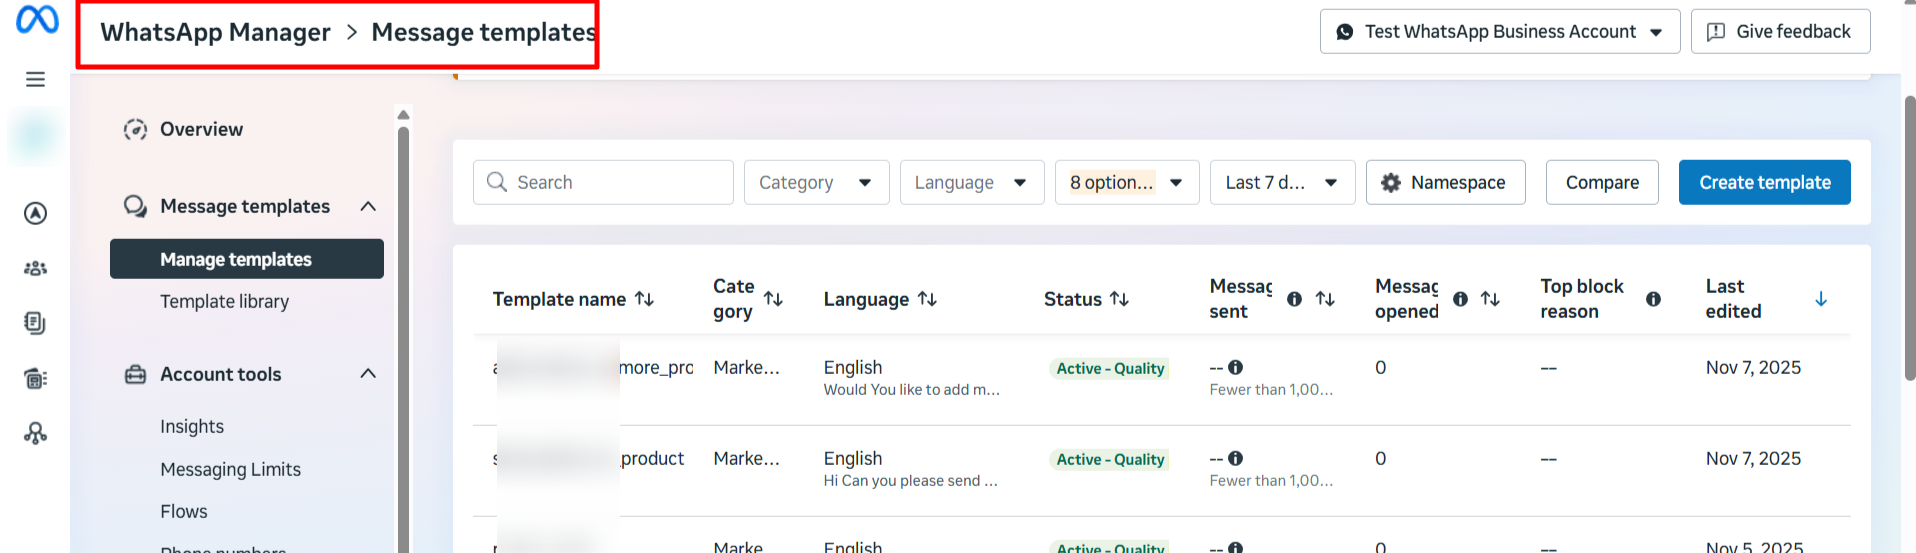
- New templates added in your Meta Business → WhatsApp Templates section won’t appear until you hit the “Sync now” button.
- You can preview how the message will look in the template preview section.
Coupon settings
When you’re setting up WhatsApp templates, you can also send discount coupons automatically to your customers. Here’s how both options work:
Dynamic Coupon Code
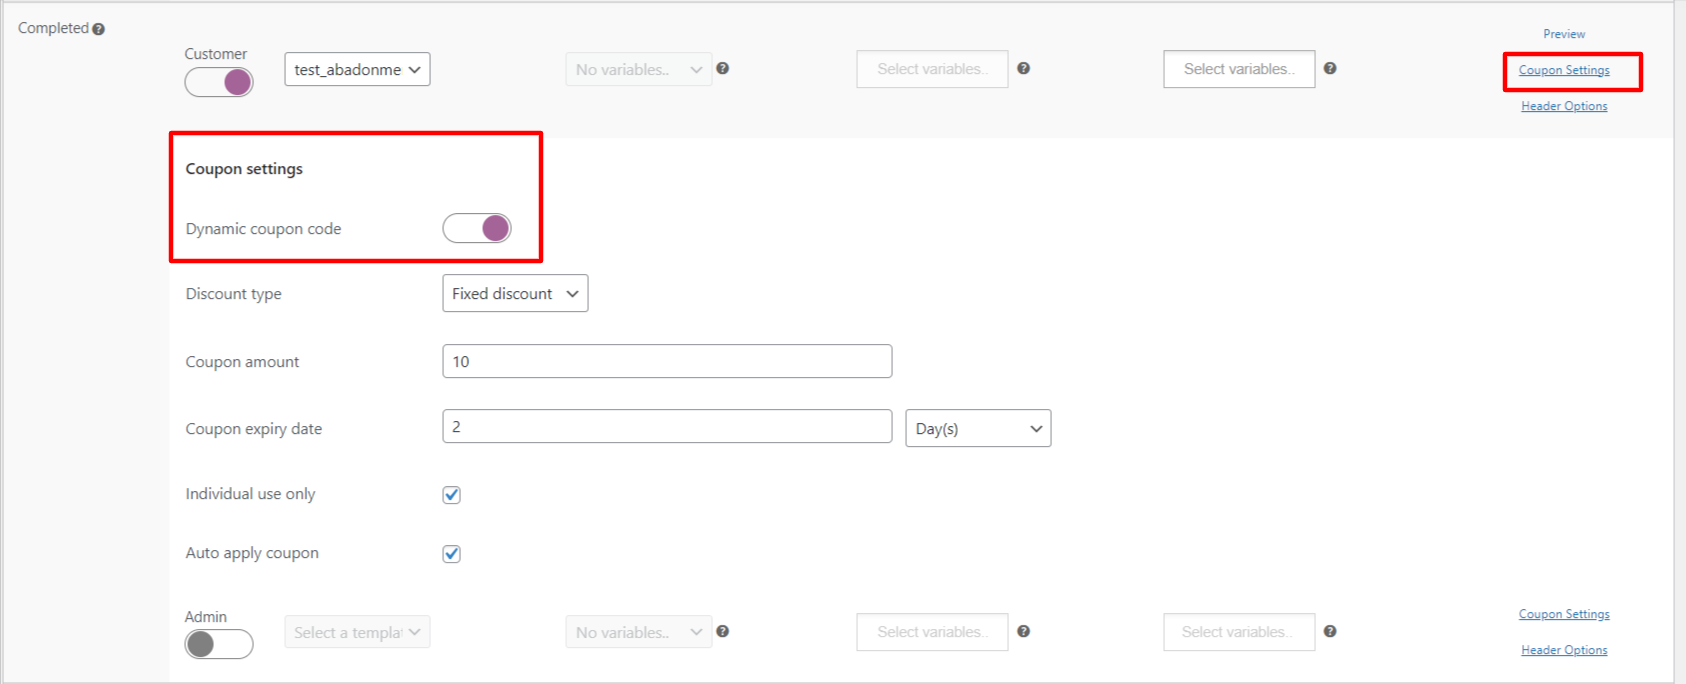
- Turn this ON if you want Notiqoo to automatically generate a new coupon for each customer.
- You can decide the type of discount — like a flat ₹20 off or a percentage.
- Set the coupon value (example: 20 means ₹20 or 20% based on your selection).
- Choose how long the coupon will be valid — like 5 days.
- If you tick “Individual use only”, the coupon can’t be used with other discounts.
- Turn ON “Auto apply coupon” if you want the coupon to be applied directly when the customer clicks the button.
- This is perfect if you want to make your customers feel special with unique codes!
Fixed Coupon Code

- If you already have a pre-created coupon and just want to send that.
- Just type in the code (like TEST20) and you’re done.
- No automatic generation here — it uses the exact code you’ve given.
- This is great if you’re running a campaign with a standard coupon code for everyone.
You can use different coupon settings for different order statuses (like Pending Payment, Processing, On Hold, etc.) — and preview them anytime by clicking preview and Coupon Settings
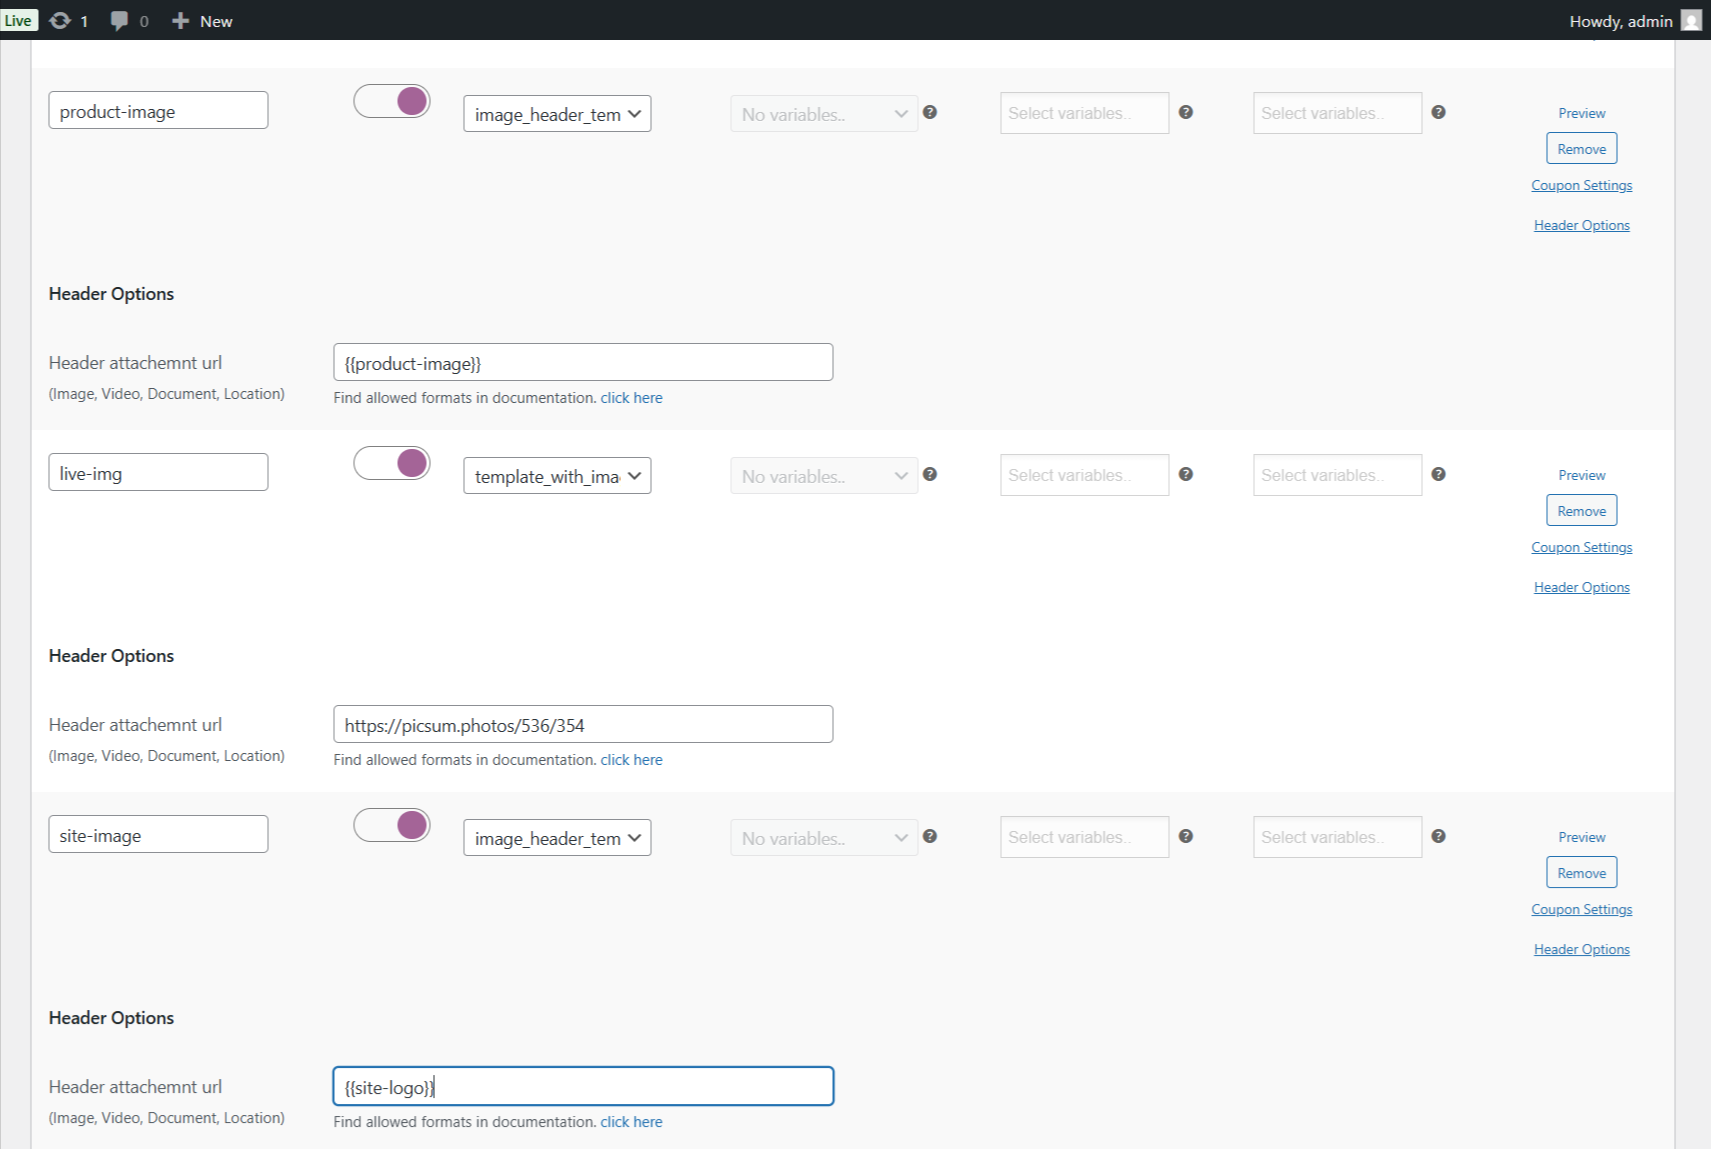
Header Options in Templates
We’ve added extended template support to make your messages richer and more engaging.
Now you can use named and numbered templates with header types:
- Image
- Video
- Document
- Location

Media headers can be an image, video, or a document such as a PDF. All media must be uploaded with the Resumable Upload API.
Adding an Image Header
You can insert a product or site image in the header.
Options:
- {{product-image}} – Auto-loads the product image.
- {{site-logo}} – Uses your site logo.
- Direct Image URL – e.g., https://picsum.photos/536/354
For the first two options, follow the exact format shown above.
Supported formats: JPG, PNG.
Adding a Location Header
Location headers can only be used in templates categorized as UTILITY or MARKETING. Real-time locations are not supported.For location headers, the URL field must follow this exact format:
latitude:longitude:place-name:place-address
Example:37.483307:-122.148981:Pablo Morales:1 Hacker Way, Menlo Park, CA 94025
Adding a Video or Document Header
Paste the direct file URL in the Header URL field.
Use supported file types only (refer to Meta documentation).
Quick Remainder:
- Your template’s header type must match the kind of link you paste.
- For supported formats, check the official guide
- The link will only work in a live environment (not locally)
2. Add Custom Parameters Using Filter Hook
You can define custom parameters for templates by using a filter. Add the following code in your theme’s functions.php file:
add_filter(‘woom_additional_template_params’, ‘function_name’, 10, 2);
function function_name($parameters, $order)
{
$custom_params = array(
“param1″ => ”,
“param2″ => ”
);
if ($order !== null) {
$custom_params = array(
“param1” => ‘value1’,
“param2” => ‘value2’
);
}
$parameters = array_merge($parameters, $custom_params);
return $parameters;
}
This hook allows you to dynamically pass extra data into your templates.
Once added, the parameters will be accessible within the Notiqoo template editor.
Hover over the question mark icon beside any parameter to see the defined values.
Read this detailed blog post to learn how to add custom parameters in Notiqoo templates
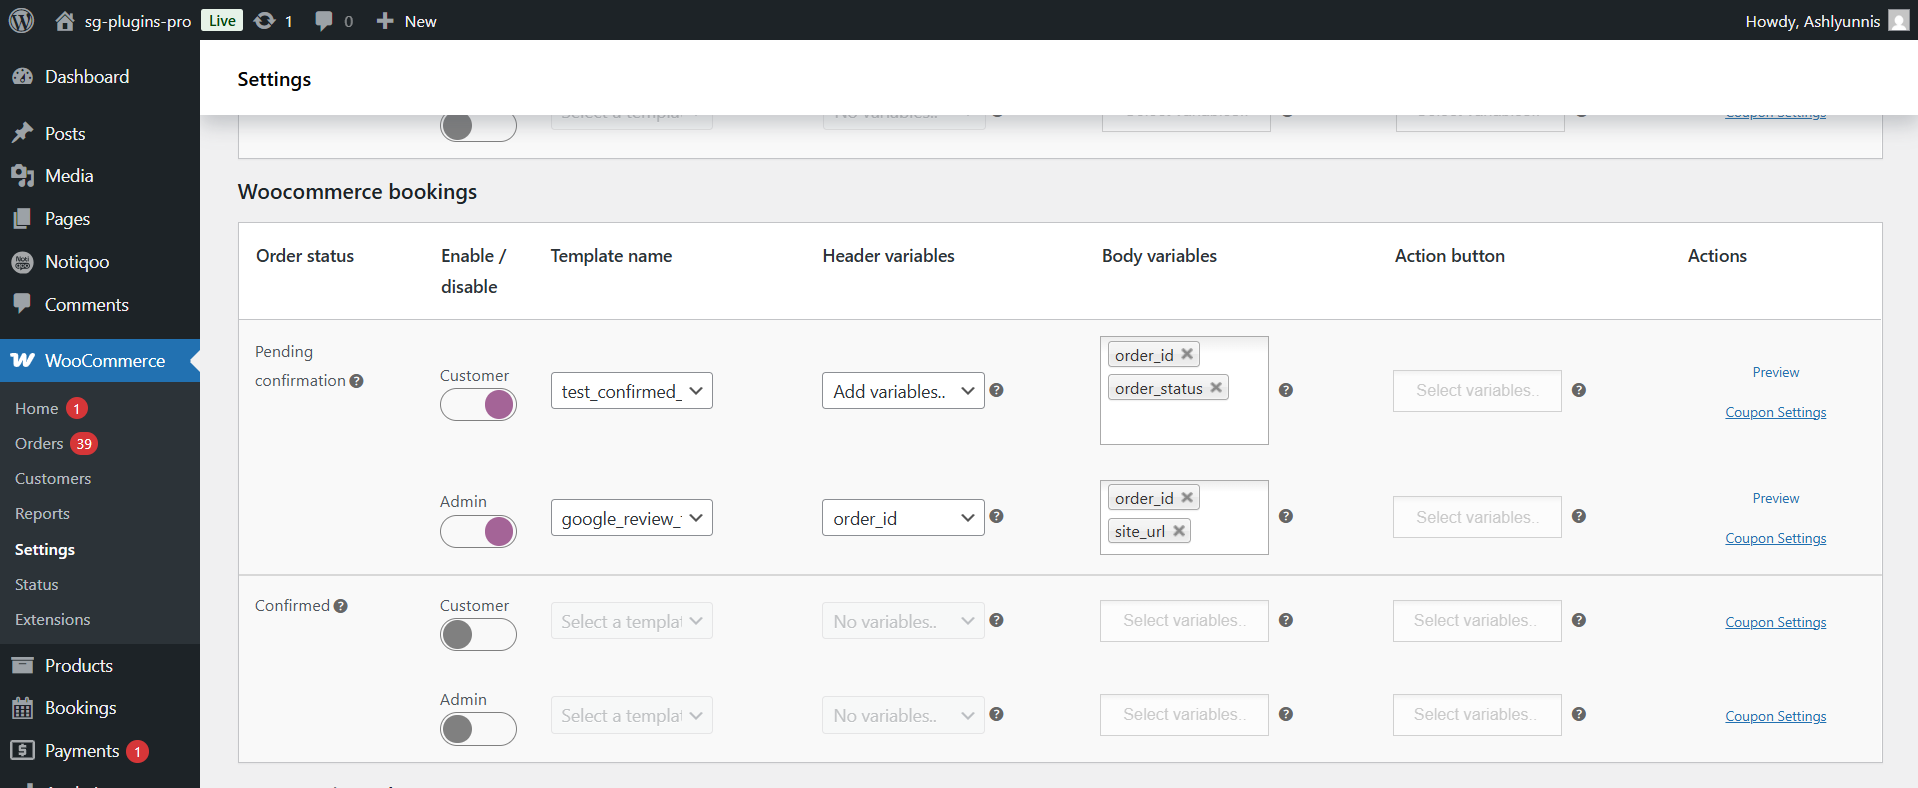
3. WooCommerce Bookings
If you’re using WooCommerce Bookings, make sure to enable Booking Notifications to keep customers informed of their booking status via WhatsApp
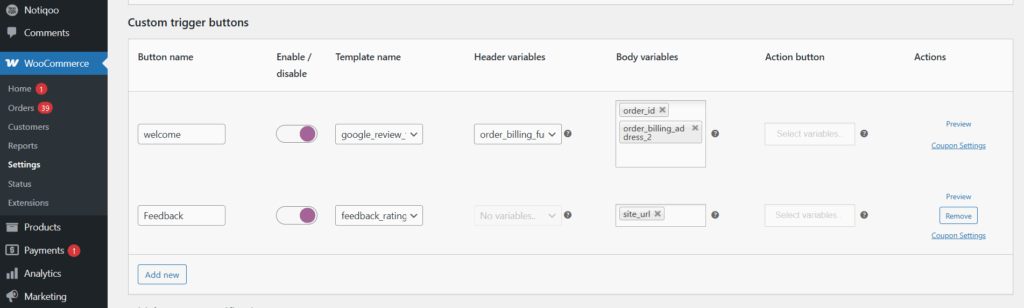
4. Add Custom Buttons
You can add more buttons (e.g., call to action or quick reply buttons) in your templates. Just add them in the button section and save your changes.
Once you enable this, a custom button will appear in the WooCommerce order details page (inside each order).From there, you or your team can manually send additional WhatsApp templates to the customer.It’s perfect when you want to send a follow-up, a reminder, or any custom message after an order is placed.
📺 Watch the video tutorial to learn how to set up
